Crochet Scalloped Edging
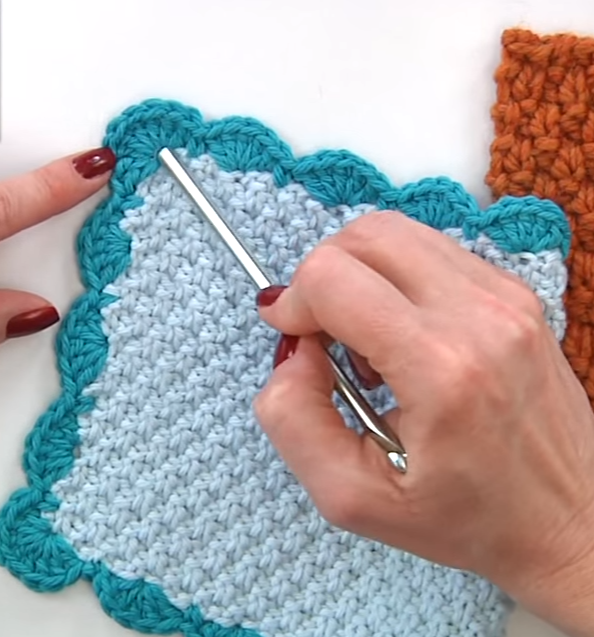
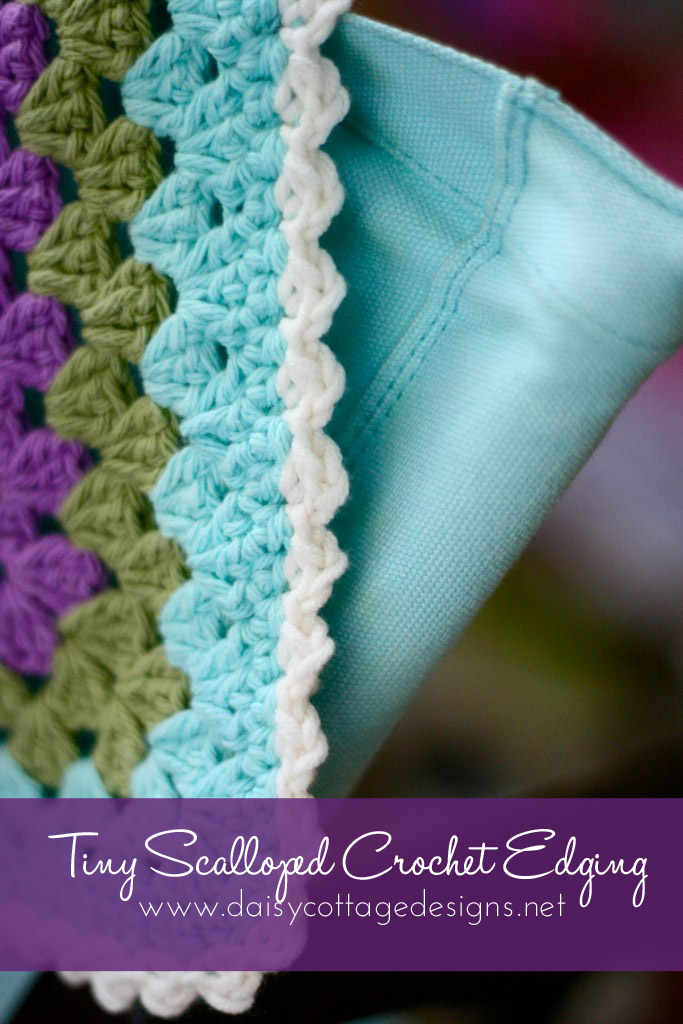
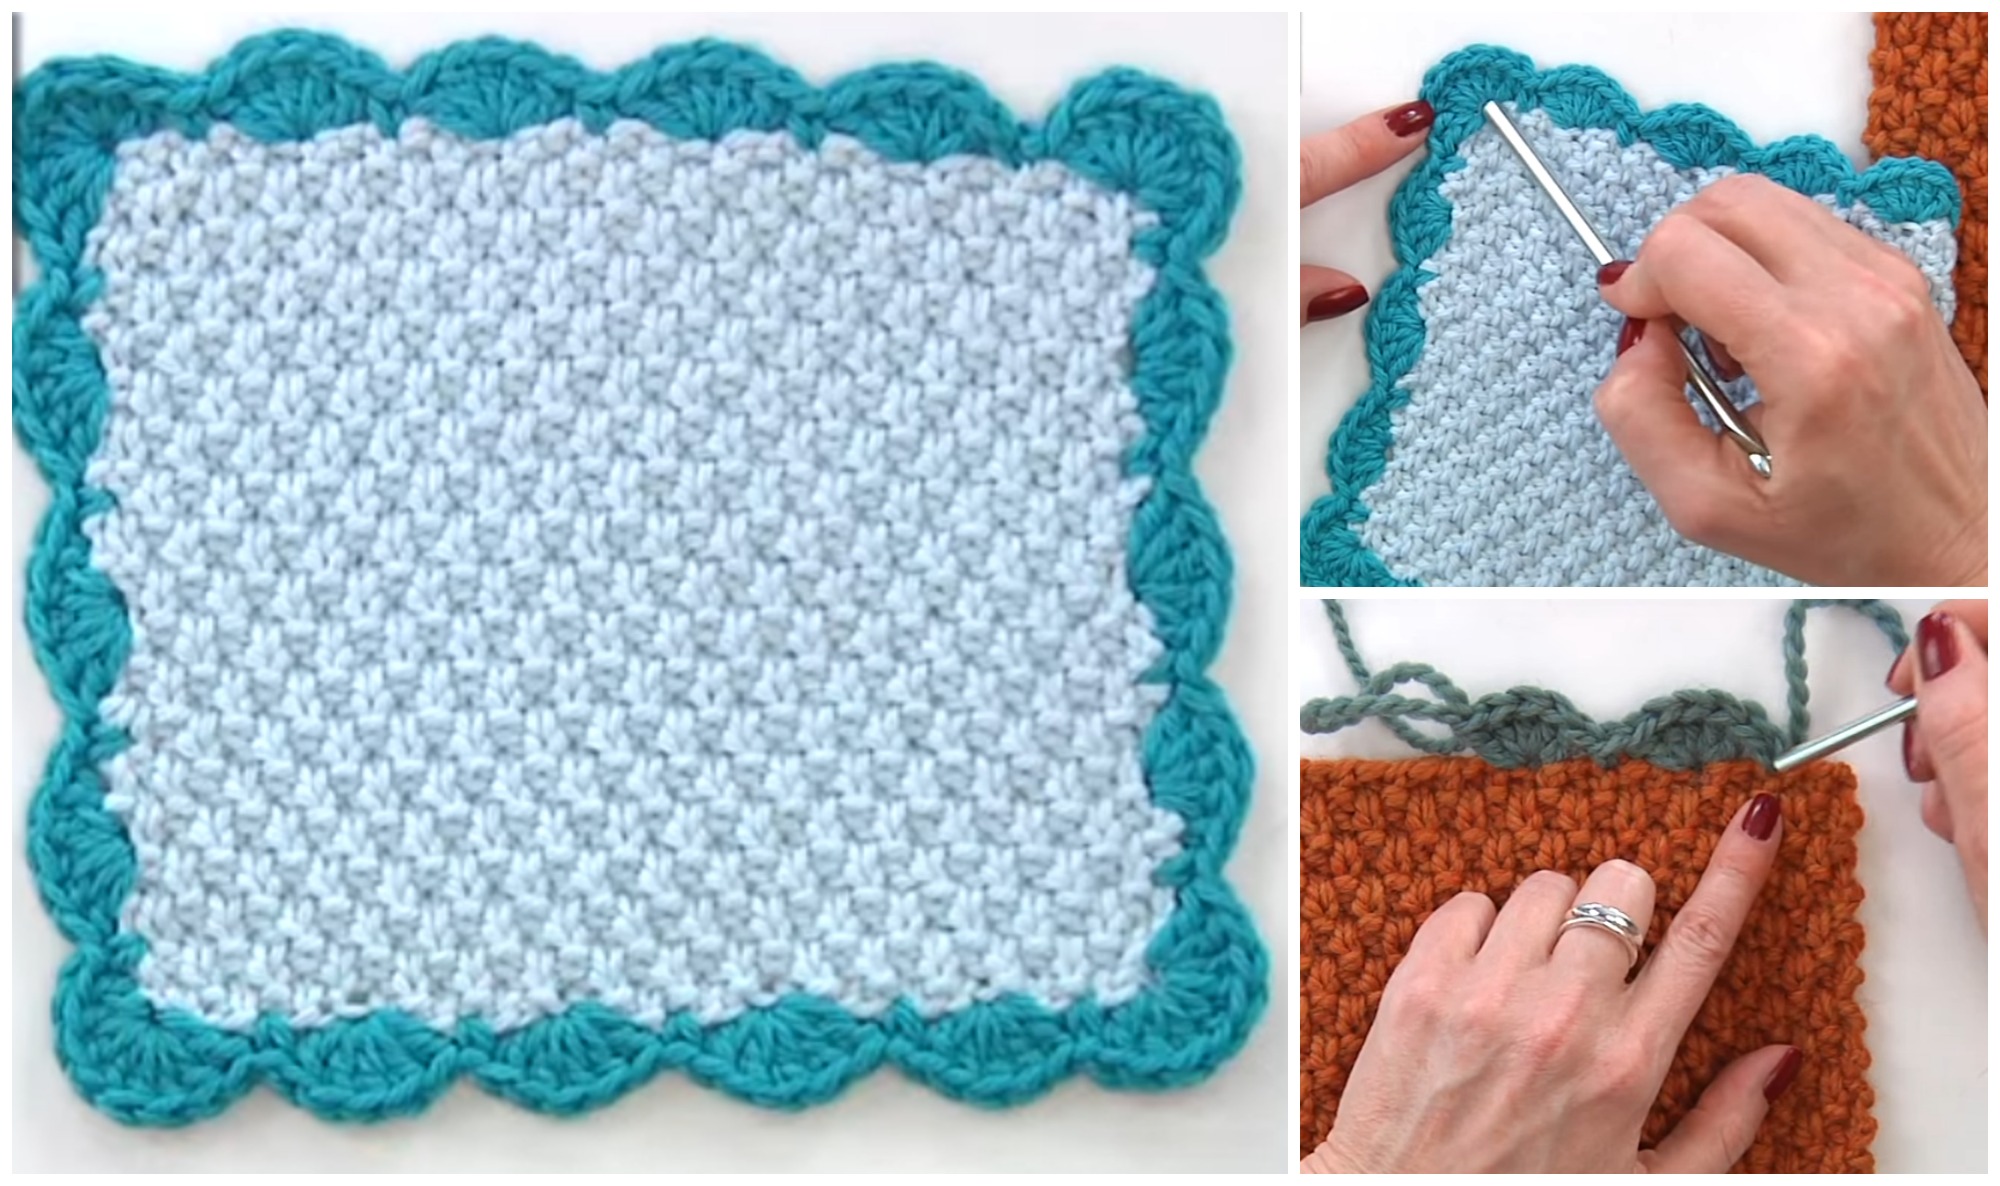
Crochet Scalloped Edging - For every scallop you’d like to add, crochet an extra 4 chains/stitches.} row 1~ chain 2. It can be finished with a simple single crochet border, but it can also be completed with this unique scalloped crochet border, for which you'll find the instructions in the placemat. Web hi everyone,many of you asked for a tutorial on how to add a border to your blankets. Crochet 1 half double crochet into the fourth chain from your hook. Edge scallop sk2, 4dc in next st, p. Web one of my favorite ways to work crochet into your knitting is with crocheted edgings. This post includes affiliate links. Join with a slip knot on the round 1 (base row)’ exposed front loops, 2 stitches before the corner stitch. Crochet involves in creating a fabric out of yarn by using a. This crocheted edging is made up sets of 5 double crochet stitches (dc) and single crochet stitches (sc). The how to crochet scalloped edging tutorial shows you exactly how to make this crochet edging so that you can learn to crochet with ease. How to create this scalloped crochet edging? This scalloped wonder can easily be used for other items too! Single crochet into 1 stitch, *skip 2 stitches, 5 double crochets into next stitch, skip next 2 stitches, single crochet into next stitch, repeat from *. This post includes affiliate links. Materials for this video were provided by lion brand and furls. You can easily crochet this border around any edge, blanket or garment. Join with a slip knot on the round 1 (base row)’ exposed front loops, 2 stitches before the corner stitch. Web this is what you will need to crochet a scalloped edge: For every scallop you’d like to add, crochet an extra 4 chains/stitches.} row 1~ chain 2. Web this is what you will need to crochet a scalloped edge: It's easy, feminine, and adds just the. Materials for this video were provided by lion brand and furls. I recommend you crochet a single crochet base row on your edge before starting the border so you can have stitches on all sides of your blanket. You may also. Get the pattern 14 camel stitch border photo credit: It can be finished with a simple single crochet border, but it can also be completed with this unique scalloped crochet border, for which you'll find the instructions in the placemat. Web the large scalloped edging is made with a base row of chains onto which you crochet the large treble. Get the pattern 14 camel stitch border photo credit: Web easy peasy pillowcase with crochet scalloped edging free pattern. This crocheted edging is made up sets of 5 double crochet stitches (dc) and single crochet stitches (sc). To be exact in your numbers, you'll need a multiple of 6 stitches plus 1, ie. Are you still not sure how to. Yarn for the scalloped edge. Web one of my favorite ways to work crochet into your knitting is with crocheted edgings. This edge starts with a foundation round of (sc, chain 2, skip 1 stitch) repeated, with (sc, chain 2, sc) in the corners. Web if you’re ready to finish off a blanket, placemat, tablecloth, sheet or other square /rectangular. You can go for a contrasting color, a similar color, or the same as your project. Web this is what you will need to crochet a scalloped edge: Web one of my favorite ways to work crochet into your knitting is with crocheted edgings. This is an easy and quick project. This crocheted edging is made up sets of 5. For best results, make sure that the yarn is the same weight as the yarn that was used to knit or crochet the item. Edge scallop sk2, 4dc in next st, p. Web this is what you will need to crochet a scalloped edge: End by working a slip stitch into first single crochet. Web if you are new to. Web you can work your crochet scallop edging straight into a raw edge, but it's much easier to fitin the stitches if you have single crochet stitches to follow. Note you can use any size crochet hook and yarn weight to make this scallop. This scalloped wonder can easily be used for other items too! Single crochet into 1 stitch,. You can go for a contrasting color, a similar color, or the same as your project. The pattern is worked from the neck down. This scalloped wonder can easily be used for other items too! Web the picot scallops border is a simple edging constructed with double crochet fans that have a picot stitch made at the top. Preferably the. Preferably the same fiber content and yarn weight as used for your project. Web what you’ll need 5.00mm crochet hook 20g dk yarn {8ply} tapestry/wool needle scissors. Web the picot scallops border is a simple edging constructed with double crochet fans that have a picot stitch made at the top. Web crochet instructions for the scalloped edge: Web treble scallop. To be exact in your numbers, you'll need a multiple of 6 stitches plus 1, ie. For best results, make sure that the yarn is the same weight as the yarn that was used to knit or crochet the item. Join with a slip knot on the round 1 (base row)’ exposed front loops, 2 stitches before the corner stitch.. For every scallop you’d like to add, crochet an extra 4 chains/stitches.} row 1~ chain 2. Web if you’re ready to finish off a blanket, placemat, tablecloth, sheet or other square /rectangular craft project, this scalloped crochet edge is a fantastic pattern to consider. It can be finished with a simple single crochet border, but it can also be completed with this unique scalloped crochet border, for which you'll find the instructions in the placemat. You can go for a contrasting color, a similar color, or the same as your project. Kathryn vercillo this is a free crochet placemat pattern for a simple placemat made with half double crochet. Join with a slip knot on the round 1 (base row)’ exposed front loops, 2 stitches before the corner stitch. You may also enjoy these posts: It would also work for various garment edges or accessories; Skip 1 chain loop, sc in the next chain loop to anchor the scallop. [tutorial] crochet basics | quick and easy scalloped crochet edging learn how to make a lovely scalloped pattern of crochet edging. Web easy crochet scallop edging tutorial. Web the picot scallops border is a simple edging constructed with double crochet fans that have a picot stitch made at the top. Here i show you how to work a simple scalloped edge.crochet instructio. This makes the length easily customisable. Get the pattern 14 camel stitch border photo credit: Web hi everyone,many of you asked for a tutorial on how to add a border to your blankets.
How To Crochet A Scalloped Edging Interweave

How to Crochet Scalloped Edging (Left Handed) YouTube

How To Crochet A Scalloped Edging Interweave

How to Crochet The Easy and Beautiful SCALLOPED EDGE! in 2021 Crochet
:max_bytes(150000):strip_icc()/detailofcrochetshelledging-5983b602685fbe0011b41382.jpg)
Simple Shell Stitch Crochet Edging Pattern
Crochet Scalloped Edge Crochet Ideas

How To Crochet A Scalloped Edging Hopeful Honey Crochet edging

3 Types of Crochet Edging Patterns for Beginners How To Crochet
Scalloped Crochet Edging Lauren Brown Flickr
Crochet Scalloped Edge Crochet Ideas
Web If You Are New To Crocheting Or Just Haven't Looked Too Far Into Different Stitches, You're In Luck.
Web One Of The Very First Edgings Or Borders I Learned In Crochet Was The Simple Scalloped Edging, Or Shell Stitch Border.
36 + 1 = 37 Or 18 + 1 = 19, Etc,.
Note You Can Use Any Size Crochet Hook And Yarn Weight To Make This Scallop.
Related Post: