How To Put Safety Eyes On Crochet
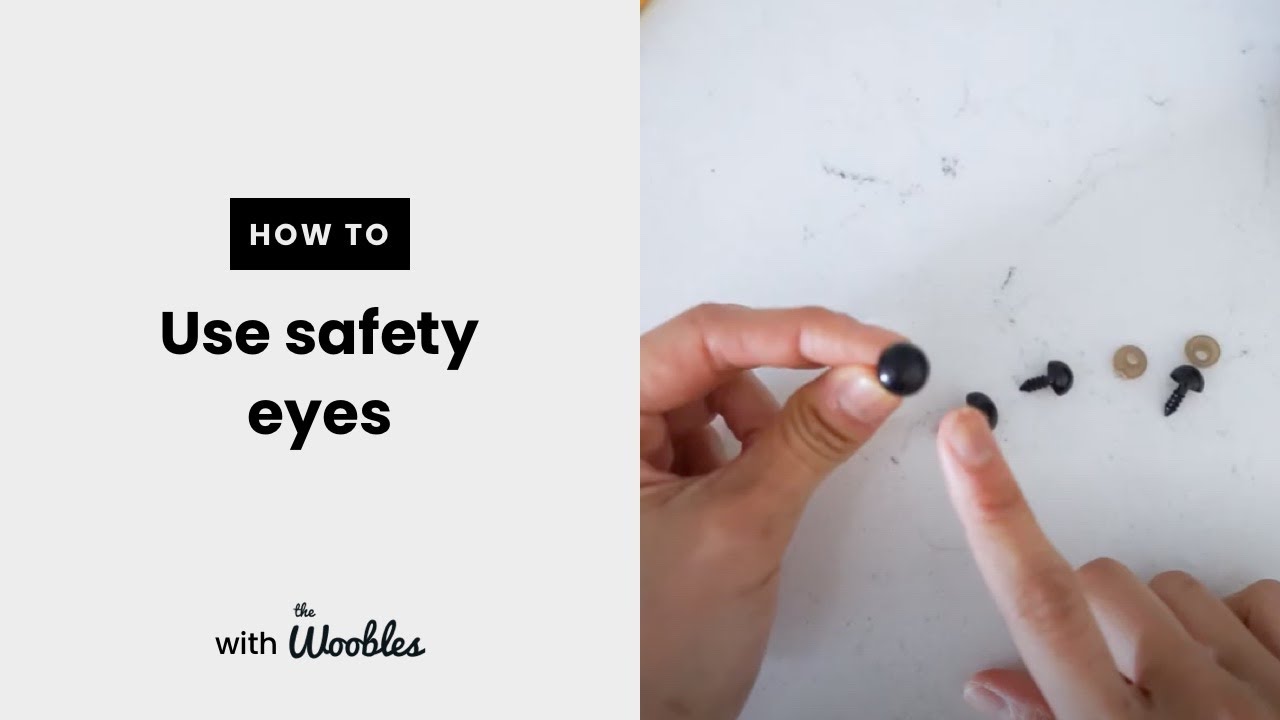
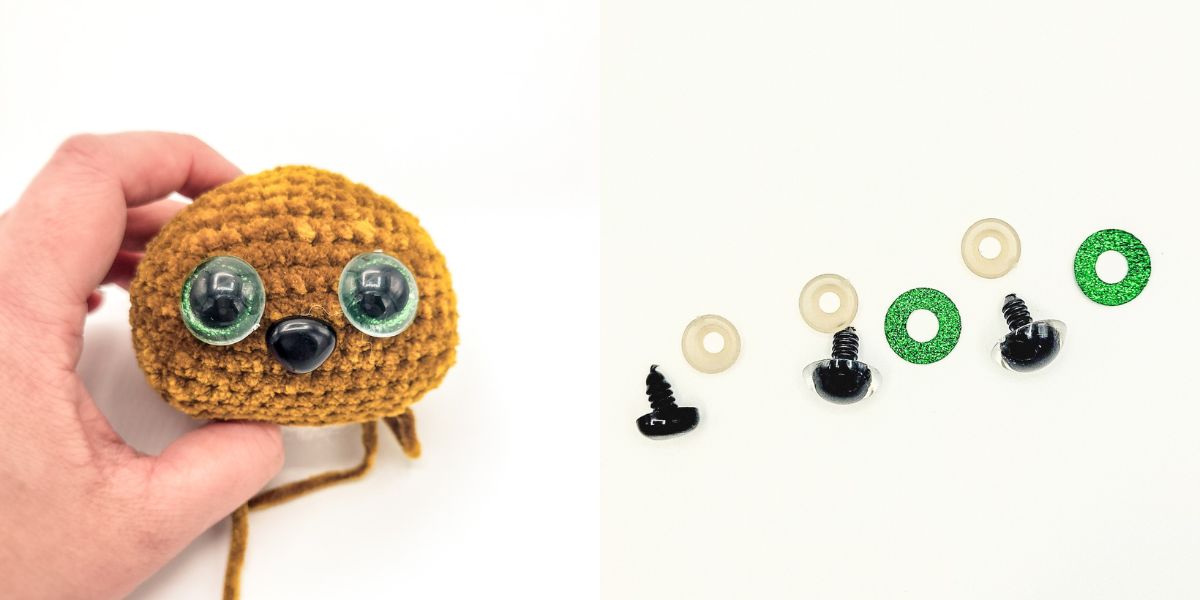
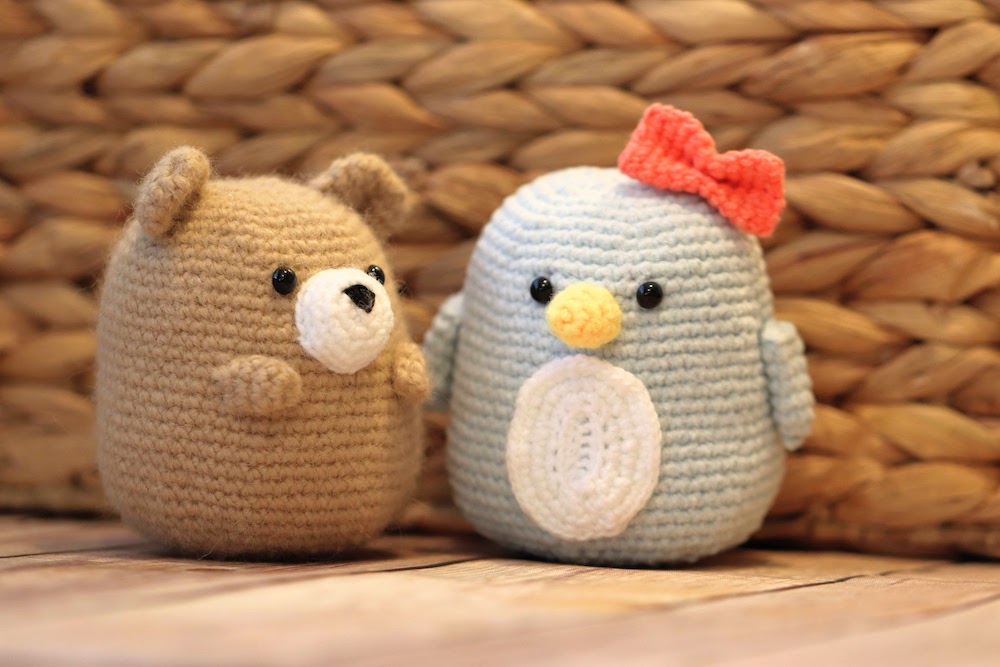
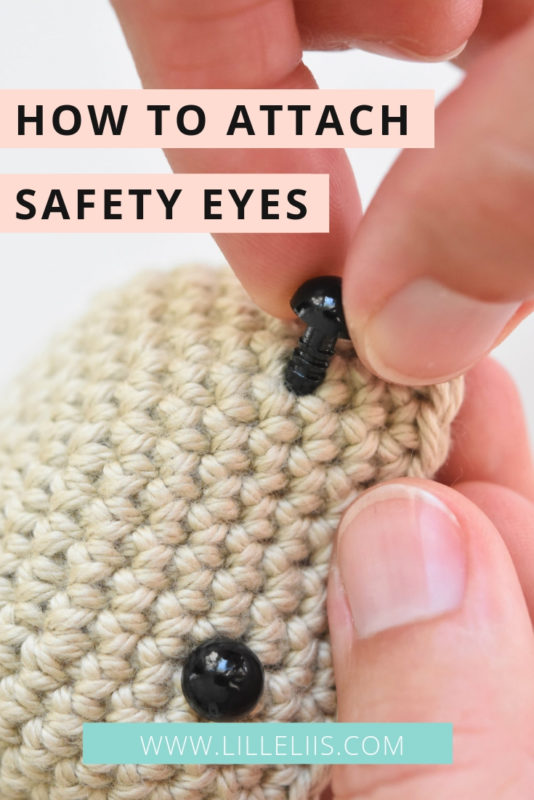
How To Put Safety Eyes On Crochet - A link to the free pattern is under the photo. Welcome to our latest crochet adventure! You just need to poke a hole! Web in this photo crochet tutorial, you’ll learn an easy way to embroider eyes on your amigurumi. Web mastering safety eyes in amigurumi is key to creating secure & adorable toys! Web safety eyes are used for crafting but more specifically they are perfect for crochet and amigurumi. Below you will also learn how to best proceed when adding large eyes (with a thick stem) to tightly crocheted pieces without damaging them. Web i’ve made a video (below) that shows you how to install them. No toy is complete without a cute pair of eyes! Web safety eyes are plastic attachable eyes that snap together to connect to any surface with a small hole or that you can poke through, obviously making them perfect for amigurumi. Web i’ve made a video (below) that shows you how to install them. Web how to attach safety eyes to your amigurumi. Web how to use safety eyes. Web a detailed guide showing you how to correctly insert safety eyes into sewn, knitted and crocheted toys with handy tips. Web learn how to insert safety eyes, tips for positioning, how to remove eyes as well as why i prefer using plastic washers. Learn more about amigurumi eyes. Welcome to our latest crochet adventure! Web if you use safety eyes for your finished amigurumi or other crochet projects, the following article explains how to place and secure them correctly. You just have to know where to start. Web learn how to insert safety eyes securely for your crochet amigurumi.note that safety eyes aren't safe for children under 3 years old, or for pets! This eye embroidery technique is an ideal replacement for plain black safety eyes as the result gives you a very similar aesthetic. In this article, we will break down how to place and apply the safety eyes and nose. Welcome to our latest crochet adventure! You just have to know where to start. Web safety eyes are plastic attachable eyes. Web how to attach safety eyes to your amigurumi. You just pop them on and go. They are easy to make, and can easily be customized to match both your, and the toy’s mood. In another post, we will cover embroidery eyes and adding details around the eyes. Web a detailed guide showing you how to correctly insert safety eyes. No toy is complete without a cute pair of eyes! Web i wanted to share today one of my favorite alternatives to plastic safety eyes when making amigurumi. Learn more about amigurumi eyes. Web in this photo crochet tutorial, you’ll learn an easy way to embroider eyes on your amigurumi. Web safety eyes are a popular choice for amigurumi makers. Web if you’re new to amigurumi or making crochet dolls, figuring out how to use safety eyes can be a challenge. Web if you use safety eyes for your finished amigurumi or other crochet projects, the following article explains how to place and secure them correctly. A link to the free pattern is under the photo. All you have to. Web a detailed guide showing you how to correctly insert safety eyes into sewn, knitted and crocheted toys with handy tips. Learn more about amigurumi eyes. And bonus, they are fast and easy! In this article, we will break down how to place and apply the safety eyes and nose. Below you will also learn how to best proceed when. Web how to use safety eyes. Web i’ve made a video (below) that shows you how to install them. Web learn how to insert safety eyes, tips for positioning, how to remove eyes as well as why i prefer using plastic washers. Adding character to your crocheted amigurumi can be as simple as adding a pair of safety eyes and. Web mastering safety eyes in amigurumi is key to creating secure & adorable toys! Web a detailed guide showing you how to correctly insert safety eyes into sewn, knitted and crocheted toys with handy tips. Using safety eyes is really simple. You just pop them on and go. Web want to put a little extra sparkle on your latest doll. Web i wanted to share today one of my favorite alternatives to plastic safety eyes when making amigurumi. Plastic safety eyes (commonly referred to as craft eyes) are the perfect touch for making your creation come to life. Web a simple way to add character to any amigurumi animal is with safety eyes! 2.4k views 1 year ago. In this. Web safety eyes are a popular choice for amigurumi makers because they are simple, easy and quick. Web in this photo crochet tutorial, you’ll learn an easy way to embroider eyes on your amigurumi. Adding character to your crocheted amigurumi can be as simple as adding a pair of safety eyes and a nose. Web if you run into trouble. Below you will also learn how to best proceed when adding large eyes (with a thick stem) to tightly crocheted pieces without damaging them. There’s no skill needed to make the eyes of your crocheted toys look nice. 2.4k views 1 year ago. Web i’ve made a video (below) that shows you how to install them. Web ditch the traditional. Plastic safety eyes (commonly referred to as craft eyes) are the perfect touch for making your creation come to life. But if you’ve ever used amigurumi eyes before, you know they can be tough to put on. These came to be when i was searching for an 'eye' to have a crisp, delicate look. You can crochet or knit eyes, but plastic safety eyes look so much cuter! Below you will also learn how to best proceed when adding large eyes (with a thick stem) to tightly crocheted pieces without damaging them. No toy is complete without a cute pair of eyes! Web learn how to insert safety eyes, tips for positioning, how to remove eyes as well as why i prefer using plastic washers. Web these safety eyes are a fun way to give a crocheted project the right expression. Web if you’re new to amigurumi or making crochet dolls, figuring out how to use safety eyes can be a challenge. And bonus, they are fast and easy! This method gives you a wide range of possibilities by adopting the shape, size, color or additional effects of your amigurumi eyes. In this article, we will break down how to place and apply the safety eyes and nose. Web a simple way to add character to any amigurumi animal is with safety eyes! Web want to put a little extra sparkle on your latest doll or amigurumi? Cheap and easy to install, safety eyes add a touch of depth to your amigurumi faces. All you have to do is plot where you want them on your stuffed doll (sometimes a crochet pattern will tell you where the eyes should go), stick the post between stitches, and put the washer on the back to secure.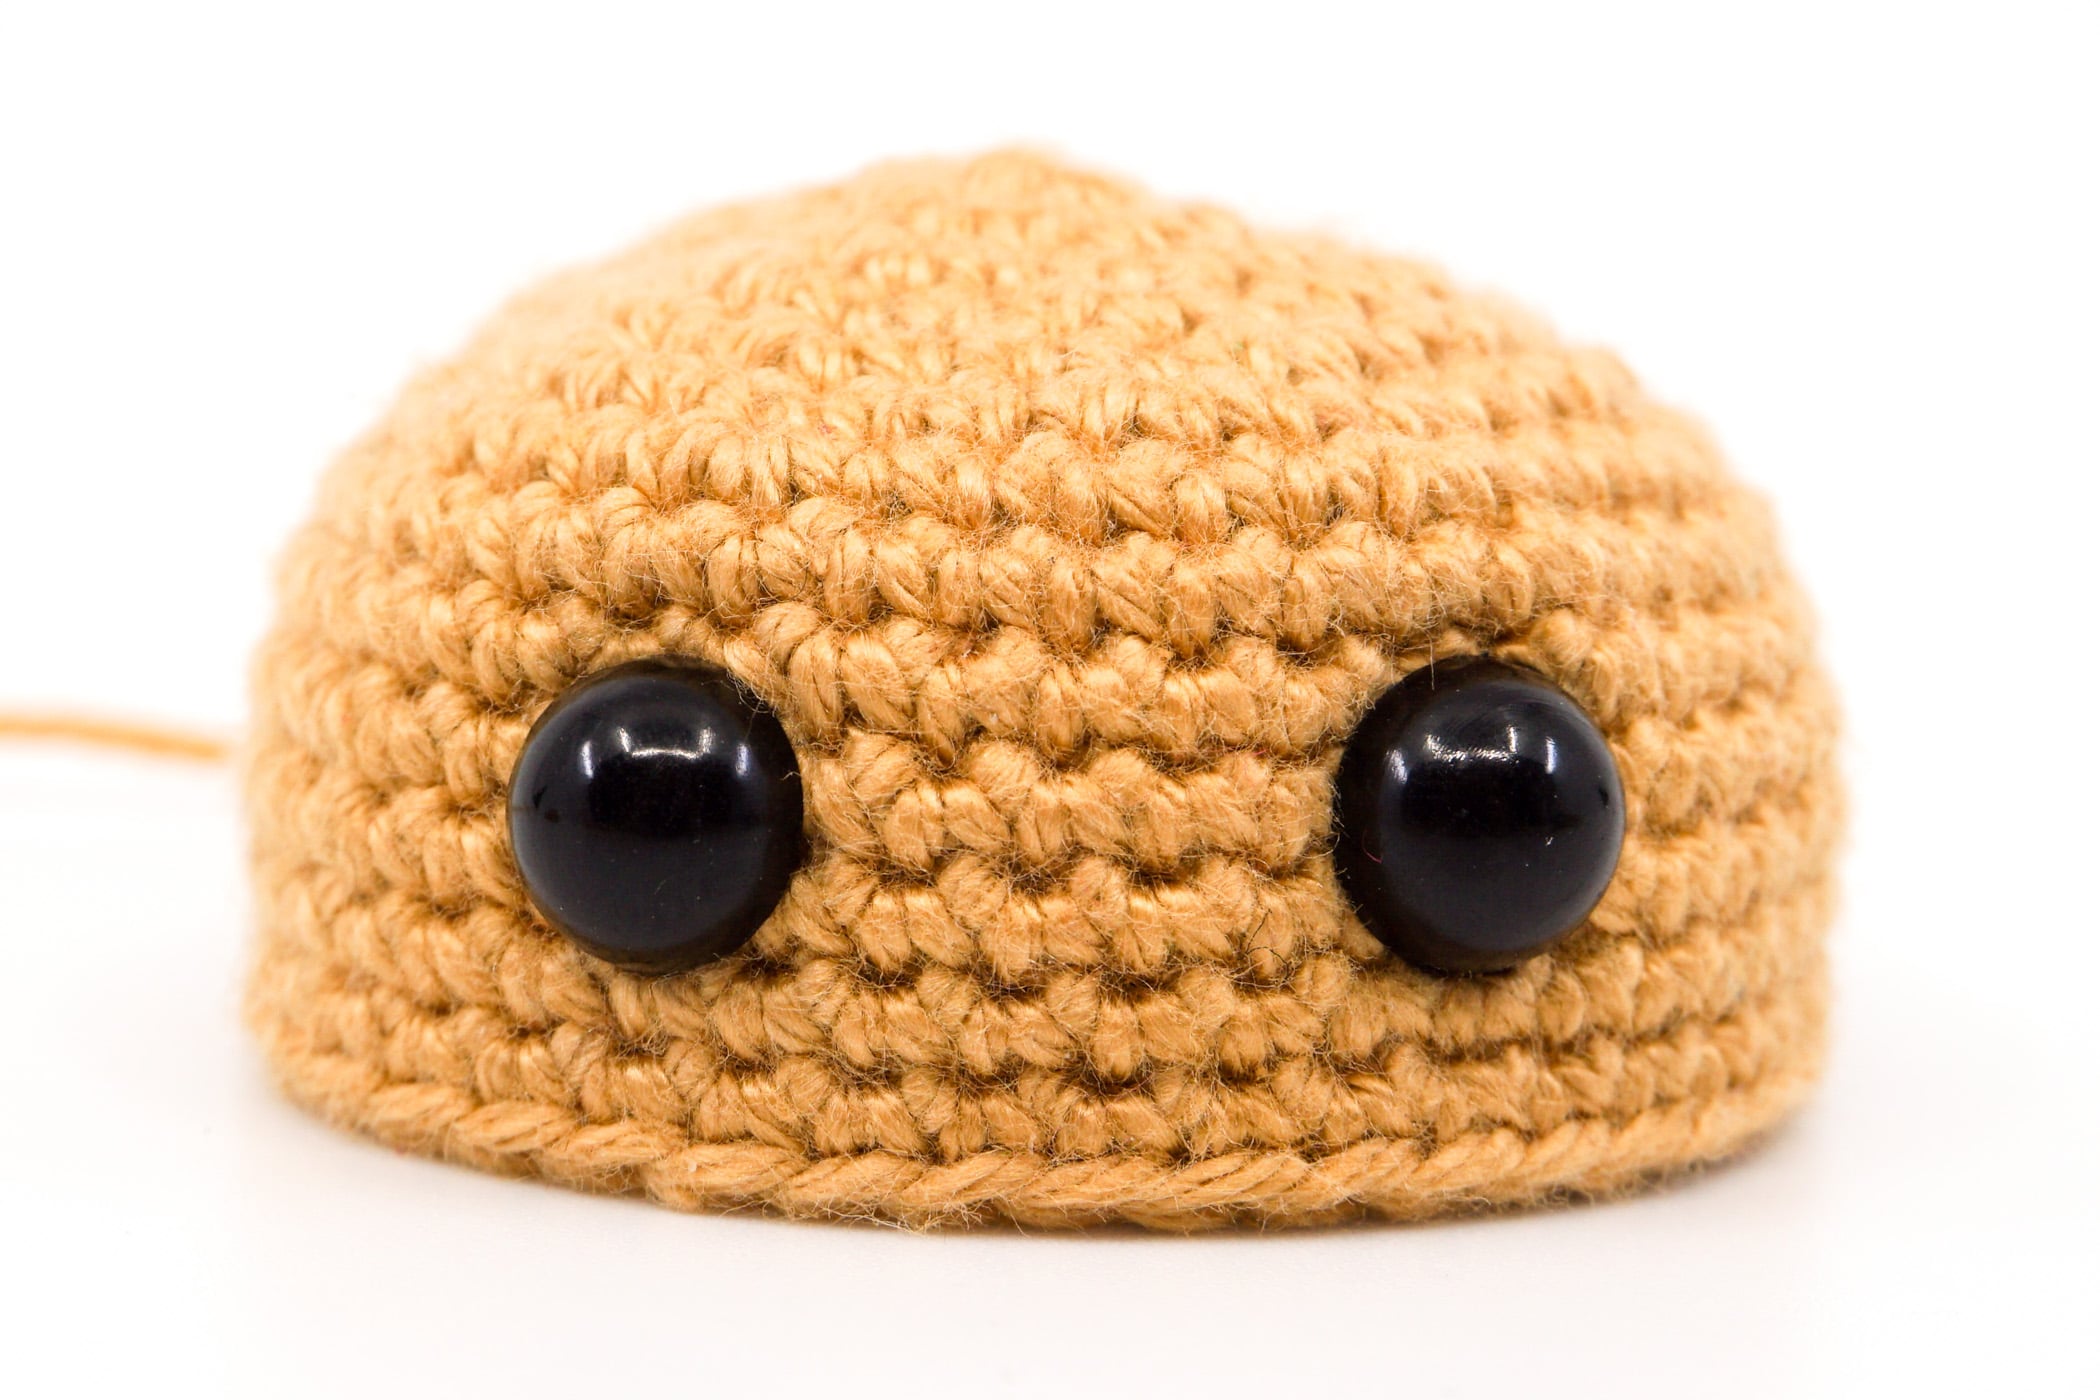
How to Attach Amigurumi Safety Eyes Supergurumi

How to attach, install, sew embroidered safety eyes to crochet and

DIY Safety Eyes for Amigurumi and Crochet Projects Your Crochet

Amigurumi Crochet Basics Inserting safety eyes YouTube
How to put safety eyes on crochet amigurumi YouTube
How to Attach Safety Eyes To Your Amigurumi CrochetKim™
How to Use Safety Eyes in Amigurumi (and My Favorite Sizes!) Little
Safety eyes for amigurumi toys Amigurumi and crochet tutorials

How to Embellish Safety Eyes Crochet Amigurumi Toys Crochet projects

How to Attach Amigurumi Safety Eyes Supergurumi
In This Video, We're Diving Deep Into The World Of Amigurumi And Sharing An Invaluable Tip For Securing Safety Eyes On Your.
Using Safety Eyes Is Really Simple.
You Just Pop Them On And Go.
Web Mastering Safety Eyes In Amigurumi Is Key To Creating Secure & Adorable Toys!
Related Post: